Welcome! Books, movies, music, original stories, interviews, writing, libraries, literacy, humor –all with the YA reader in mind, are just a few of the topics you’ll find here. New to the blog? Say hi! Like it? Follow away! Thanks for visiting.
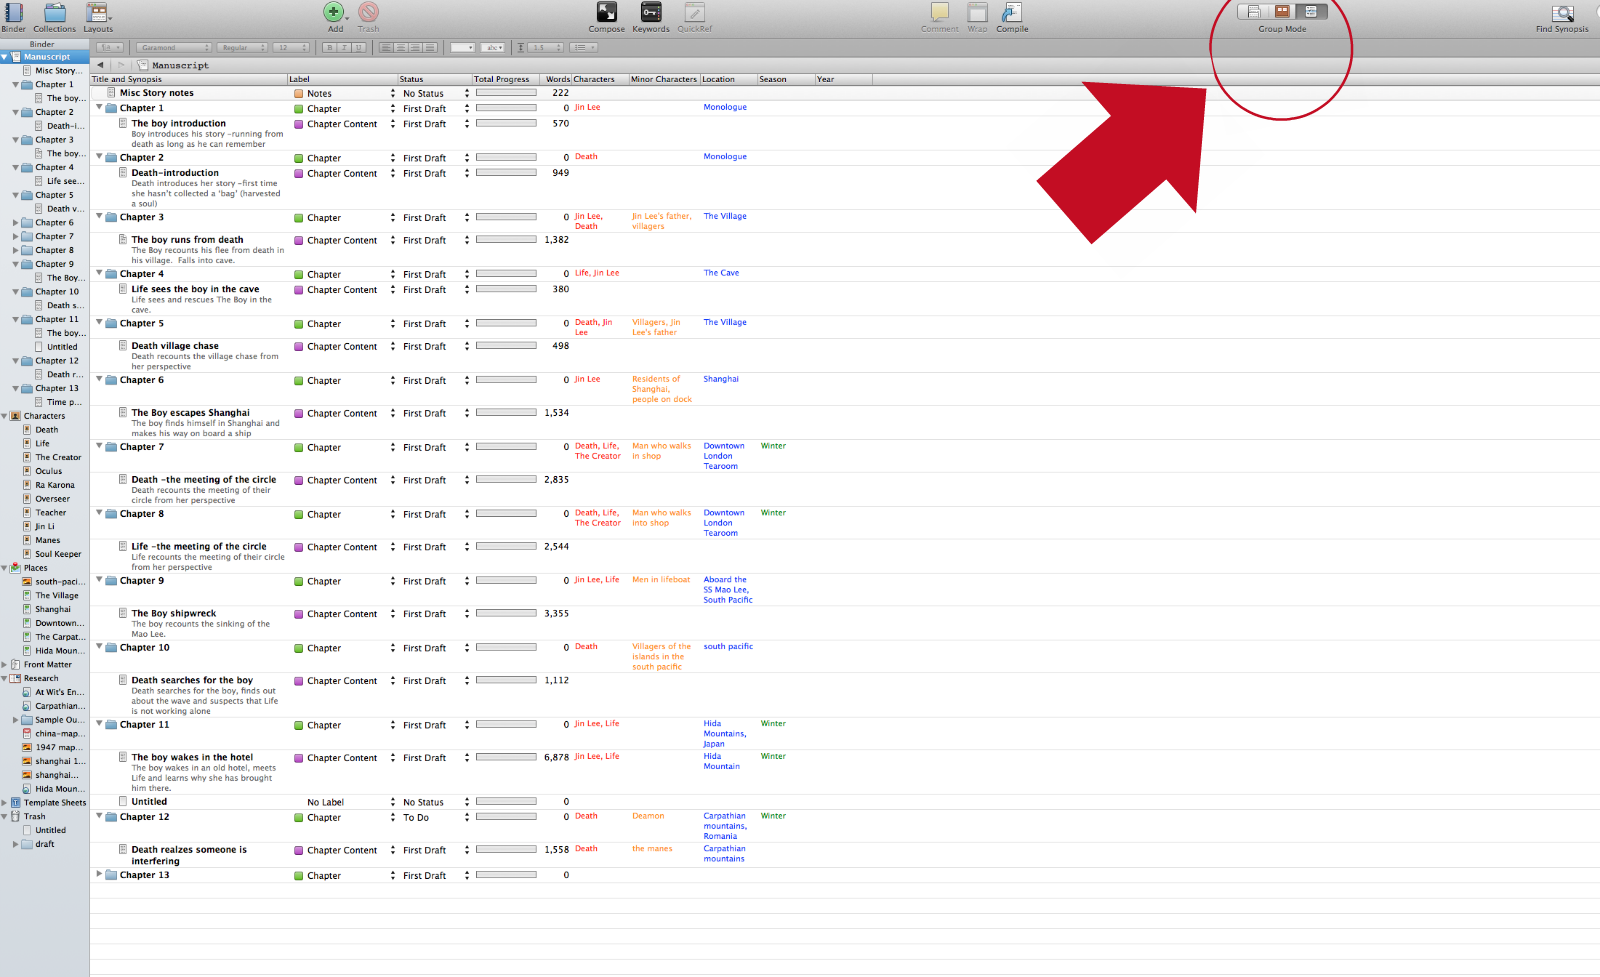
You get to it by clicking on the far right 'Group Mode'
What good is outliner view?
Loads.
Think of it like the corkboard view on steroids. Not only does it show each chapter synopsis, you can create labels, update status', look at your word counts per chapter as well as add custom columns.
Here is how to add custom columns:
Click on the Custom Meta-Data button at the bottom right of the inspector
This will bring up the Custom Meta-Data in the inspector. To add or change fields, click on the settings button and select 'Edit Custom Meta-Data settings.
The Meta-Data Settings menu will pop up.
Here you can add custom columns in the outliner by clicking the +, giving it a new title and selecting if you want to wrap the text or color the text.
When you are finished adding columns, click OK and viola, they will show up in the inspector.
You will need to fill in the information for it to show up in the outliner.
That's it. You now have custom columns and can, at a glance, view important information about every chapter you've written. Good stuff!
Do you have any custom columns you use consistently? If so, please share!
You've got a document in Scrivener you want to format. Maybe some of the folders in the binder have different formatting types and you want consistent formatting throughout the entire manuscript. Follow These steps:
This is the binder...typically on the left
1.
First you need to set the formatting how you want it. Go to:
Scrivener > Preferences > Formatting
Here you can set the formatting how you would like it. If you hit the Use Formatting in Current Editor, it will apply the formatting in the editor (main editing screen) that is currently open. Unless you want to apply the formatting of the folder open in the editor to the entire document, DO NOT click this.
Instead, click in the white area where the Nietzsche quote is then change the formatting using the buttons (bold, alignment, spacing etc.). When this is how you'd like it, close this window.
2.
Now go to Documents > Convert > Convert Formatting to Default Text Style
you will get this pop up
3.
To convert the document with the formatting you set in the formatting preferences Scrivener > Preferences > Formatting menu, (the settings you just customized -step 1,) don’t check anything. Click okay.
Now whatever you have open in the editor will match the formatting you set in formatting preferences (step 1).
4. To convert an entire manuscript or multiple folders/documents within a manuscript, select the folders (or the entire manuscript) and repeat step 2.
Done!
This process took me some digging to figure out. Hopefully someone finds this helpful. Let me know if you do.
I know, this is quite different than my typical creative blog post...but I also know there are a few writers who read my blog and other Scrivener users (If I tag this right) who may benefit.
I'm quasi-new to Scrivener and wanted to use it with my editor to allow her to make changes as well as allowing me to view and approve the changes she made. After searching on the web for a good explanation (and not finding one), I had to figure it out myself.
Note: I use a Mac
There is a video that is helpful (below) but it misses some things.
The first thing you have to decide is how you are going to share the Scrivener file. My editor and I use Dropbox. Dropbox is a file sharing site like Google docs only I like how it interfaces with my computer and portable devices better than Google docs. Once you create a Dropbox account and load it onto your computer, it appears and behaves as a drive (on a Mac), which is very handy.
So we figured out how to share the file back and forth. Now to view and approve changes.
I'm going to assume you are familiar with the Scrivener layout. (if not, watch this video) Before you send your draft off to your editor, you'll need to take snapshots of the document (or every chapter depending on how you lay out your document).
In the inspector, click on the small camera Icon at the bottom. This will take you to the snapshots view.
For some reason, I wasn't able to snapshot my entire manuscript at once. I had to do it chapter-by-chapter. In order to do that, click on the chapter content containing the text in the Binder. That will bring it up in the editor in the middle. From there simply click the plus.
Re-name the snapshot by clicking on the default title...or not, up to you. When you've done this for all your chapters, you're ready to send it off to your editor. I always copy the original file and keep one for myself and put the other in the DropBox shared folder.
Your editor can go through your manuscript, make changes, add comments etc. When she is done, she should do the same thing -take a snapshot. When she moves it into the Dropbox folder, you can open the file and should see her snapshot below your own.
Now, to compare.
The editor allows you to view the two versions vertically (side-by-side) or horizontally (one on top of the other) I prefer the vertical view. To change go to:
View --> Layout -->Split Vertically (or horizontally)
You want to compare the original against your editor's copy. In the inspector, select both and click compare. You should see the changes in the inspector. You can change colors of the changes (red = delete, green = addition etc.) in preferences (watch the video above for details)
The thing is, you don't want to approve changes in this tiny screen. You need to move a snapshot to the right panel of the editor in order to do a side-by-side comparison. This is the part that I had trouble with because they didn't describe it in the video too well so PAY ATTENTION.
I don't quite understand why you must do this but this is how it works.
Right now, you've got two vertical screens with identical contents in them and the changes showing up in the inspector.
To get the changes to show up in the right side of the editor you need to first click anywhere in the LEFT side of the editor. Now, go back to the inspector and click on the ORIGINAL snapshot (the one with the oldest date).
Now, click and drag that snapshot to the top menu bar of the right panel in the editor.
STOP! Before you do this you must press and hold the option key (Alt)... but don't hit it first. Click, start dragging then press and hold option, continue dragging and drop it in the top menu bar.
Now you will have the changes appear on the right, the original on the left.
I have no idea why you drag the original snapshot when you want to compare the newest snapshot...you'd think since the original is already in the left panel that you would drag and drop the newer snapshot. I also have no idea why pressing option before you click and drag doesn't work...it just doesn't (for me, anyway).
Compare old to new, you can make changes to the version in the left panel (which is the most current version -the one your editor has updated, saved and put into Dropbox) or not depending on whether you want to accept the changes.
When you're done, save and TAKE ANOTHER SNAPSHOT. This will ensure the editor can compare her changes with any changes you have made when she does another pass.
I don't believe this is as robust a method as provided by Word via track changes (Scrivener can import and export Word docs with ease...but that's just one more piece of software, one more step) but the benefits of Scrivener far outweigh this quasi-cumbersome method of comparing versions.
If you know something I don't, please share! I am a relative rookie to Scrivener and always appreciate hearing from people with more knowledge on the subject.